The one-button export process
Unreal Level Exporter
Goal: provide a seamless experience for our Level Designers to export 3D-levels from Unreal Engine 4, including enemies and scripted events.
During the project the Level Design team produced a prototype of the game in Unreal Engine 4, my job was to take that prototype and extract all of the relevant level data from Unreal Engine 4 into a JSON file that our in-house game engine Katastroganoff could read.
Exporter
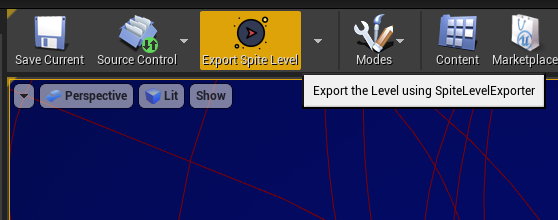
Everything that is vital to the level is exported with a single press of a button.
- Static meshes: 3D models that never move.
- The Navmesh: Exported navmesh in the .OBJ format.
- The Entities: Blueprint detection and data extraction.
- The Player Spawn: Unreal's Player Start actor.
- Scripted events: Blueprints that reference other blueprints.
This is done using two things:
- A python script for quick iteration.
- A C++ module to integrate with Unreal Engine.
Python Script
The python script is responsible for exporting static meshes, entities and scripted events.
Scanning and Data Extraction from Blueprint Actors
Before we get into Blueprints, let's step back a bit and talk about the Scene structure of Unreal Engine.
What is an Actor?
An Actor is what most other game engines call a "Game Object". The level consists of a flat list of Actors, which in turn can contain either child actors or components. In other words, actors are the building blocks of a level.
How do you export them?
Before we export them, we have to find them.
Well, how do you find them?
The function get_all_level_actors gets a list of all of the actors in the current level, and then we can filter those actors using the function by_class which takes as input the list of actors and a mysterious thing called a Class Object, and returns the actors belonging to the class object's class. Usually the class object is expressed as unreal.SomeClassOfActor, in other words it is a static object in the unreal namespace. For example, if I wanted to scan the entire level for a list of StaticMeshActors, I could do that with these two lines of code:
all_level_actors = unreal.EditorLevelLibrary.get_all_level_actors()
all_static_mesh_actors = unreal.EditorFilterLibrary.by_class(all_level_actors, unreal.StaticMeshActor)
Now, how do you export them?
Once you have the list of actors belonging to a certain class, say StaticMeshActor, you can be certain that they have a specific set of properties. So we can iterate through the list of actors, extract such properties as position, rotation and scale and put them in a format that is serializable by python. We do this with code that looks something like this:
for static_mesh in all_static_mesh_actors:
  filename = static_mesh.get_editor_property('asset_import_data').get_first_filename()
  static_mesh_comp = static_mesh.get_component_by_class(unreal.StaticMeshComponent)
  transform = static_mesh_comp.get_world_transform()
  serializable_object = {
    'static_mesh_id': filename_to_static_mesh_id(filename),
    'transform': parse_transform(transform)
  }
The functions that can be called on the StaticMeshActor and StaticMeshComponent are documented in the Unreal Engine 4 Python API.
The get_editor_property function can sometimes be used for properties that are not documented, but you know exist through other means. It is very useful.
Back to Blueprints
A Blueprint Actor might be a door that only opens when a certain list of enemies have all died, or an enemy that follows the player around and explodes when it gets close. In short, it is a special kind of Actor that the Level Designers can customize the behaviour of using a visual scripting language in Unreal Engine.
Such actors have no predefined Class Object, but create one from the asset that represents them, only when loaded. To get all instances of a certain Blueprint Actor in the level, it takes three lines of code instead of two:
all_level_actors = unreal.EditorLevelLibrary.get_all_level_actors()
enemy_master_class = unreal.EditorAssetLibrary.load_blueprint_class('/Game/Blueprints/EnemyMaster')
all_enemy_actors = unreal.EditorFilterLibrary.by_class(all_level_actors, enemy_master_class)
After that, we have to extract the properties of the blueprint. This can be done using the aforementioned get_editor_property function, only, you must use the exact naming standard of your Level Designers when they created the Blueprints, capitalization and all:
def get_enemy_properties(enemy_actor, enemy_type_id):
  return {
      'aggro_range': enemy_actor.get_editor_property('AggroRange'),
      'health_pickup': enemy_actor.get_editor_property('HealthPickup?'),
      'mana_pickup': enemy_actor.get_editor_property('ManaPickup?')
  }
Static Meshes
When you import a .FBX file into UE4, it becomes a .uasset, which Katastroganoff can't read. Therefore, I needed a way to get back to the original .FBX-file and associate that with the static mesh in the level. Conveniently, Unreal Engine will store the original import path inside its assets. All I had to do was extract it from the asset and strip from it the part of the path that is specific to the user who imported the asset, i.e. "C:\Users\...".
# Example output: "Assets/Environment/Props/EN_tree_large_01.fbx"
def parse_static_mesh(static_mesh):
    filename = static_mesh.get_editor_property('asset_import_data').get_first_filename()
    # error handling...
    return strip_system_specific_prefix(filename)
In the final level JSON, the static meshes are arranged as such:
"static_meshes": [
  "Assets/Environment/Props/EN_tree_large_01.fbx",
  "Assets/Environment/Props/EN_tree_large_02.fbx",
  "Assets/Environment/Props/EN_stump_01.fbx"
]
Followed by static mesh instances, which are where those models actually appear in the level.
"static_mesh_instances": [
  {
    "static_mesh_id": 0, // EN_tree_large_01.fbx
    "transform": "000008f300000000000000000000000000000000000008f300000000000000000000000000000000000008f300000000"
  }
]
But, doesn't that look like a weird transform?
Spatial Consistency
For static meshes such as pieces of the floor, it is very important to export their exact position, rotation and scale so that they snap properly. This is why I decided to export the transform as binary data rather than text.
000008f300000000000000000000000000000000000008f300000000000000000000000000000000000008f300000000
The hexadecimals representing the twelve 32-bit floats of a unit 4x4 transformation matrix. The remaining four values are always 0, 0, 0, 1
There are obvious drawbacks to this approach, such as that it won't work on computers with a different floating-point representation. IEEE-754 is pretty universal though, and in this case I just wanted to make sure I got the exact same values on one side as on the other, and never looked at other solutions.
The full picture
Armed with all this knowledge, you are ready to see the full picture of the level exporter. As you might already imagine, we use get_all_level_actors, scan it for various Class Objects, most of which are blueprints, store them in their own lists and iterate and process them to convert them into one big, serializable Python dictionary.
Simplified, it looks like this:
# The python object that is converted into JSON and represents the whole level
level_output = {
  'player': None,
  'light_preset': None,
  'static_meshes': None,
  'enemies': [],
  'boss': None,
  'boss_triggers': [],
  ...
}

# Get all components of all actors in the current level
all_actors = unreal.EditorLevelLibrary.get_all_level_actors()

# Get all PlayerStart actors
player_starts = unreal.EditorFilterLibrary.by_class(all_actors, unreal.PlayerStart)
if handle_player_starts(player_starts, level_output) is not 0:
  return

...

# Use python's JSON module to parse JSON and write to the file
level_json = json.dumps(level_output, indent=2)
file = open(level_filename, 'w')
file.write(level_json)
file.close()
C++ module
The C++ module is an Unreal Engine plugin that depends on the "EditorScriptingUtilities" plugin. It adds a button to Unreal Engine's action bar which is used to export the level, and a combo menu next to it with some other actions. The export button exports the Navmesh, runs the python script as described above, and reports any errors that were encountered, if any.
Navmesh
Katastroganoff uses a slightly different format for its navmesh as compared to Unreal Engine. Where Unreal Engine uses Recast Navigation, a popular tool for navmesh generation, our in-house engine Katastroganoff has its own navmesh format and pathfinding algorithm, for educational reasons.
Katastroganoff's navmesh format does not support any polygons other than triangles, while Unreal Engine 4 does. Also, Katastroganoff does not support a navmesh subdivided into tiles, while Unreal Engine 4 does.
To get the UE4 navmesh as a set of triangles, I use the GetDebugGeometry function of the ARecastNavMesh class.
TArray<UObject*> actors(UEditorLevelLibrary::GetAllLevelActors());
TArray<UObject*> navmeshObjects = UEditorFilterLibrary::ByClass(actors, ARecastNavMesh::StaticClass());

if (navmeshObjects.Num() < 1)
{
  UE_LOG(SpiteLevelEditor, Log, TEXT("No RecastNavMesh detected, Skipping..."));
  return;
}

ARecastNavMesh* nm = Cast<ARecastNavMesh>(navmeshObjects[0]);
if (nm == nullptr)
{
  UE_LOG(SpiteLevelEditor, Error, TEXT("Object 0 could not casted to a navmesh."));
}

FRecastDebugGeometry geom{};
nm->GetDebugGeometry(geom);
Side Note: You may notice that classes such as UEditorLevelLibrary were also used in the python code, without the U. This is indeed the same class, and the python version is just a binding to the C++ code. These classes all come from the EditorScriptingUtilities plugin.
Once done, the FRecastDebugGeometry structure contains a mesh of triangles that is easily serialized into the .OBJ 3D format.
I also provide a way to override the navmesh generation parameters Tile Size and Cell size since these are normally constrained. This allowed us to generate the whole navmesh as one big tile, removing the need for Katastroganoff to support multiple navmesh tiles.
Error handling
When it came to error handling, the following two things were on my priority list:
- Report all errors in some way.
- Do not report errors in a way that obstructs common use.
I divided errors into two types, warnings and errors.
Errors
An error can and should be dealt with immediately. The export process cancels itself when it encounters an error, and shows a pop-up window containing information about the error encountered.
Some examples of errors are:
- An ability pickup actor had its collision box missing
- The BossTrigger actor should have a SkeletalMeshComponent
- There were 2 or more PlayerStart actors in the level.
I also have the plugin select the relevant actors that caused the error to occur.
Warnings
A warning will not cancel the export process, and will still produce a level that does not crash the game when it attempts to load it. They are generally a little bothersome to deal with immediately, but it is good if the problem is known and dealt with at some point, so they should still be reported. However, they do not pop up immediately after the export process is done, or they would just be an annoyance.
Some examples of warnings are:
- A imported .FBX in the level was not imported from the game's Asset folder, meaning that the model will fail to display in-game.
- A Player Start actor was not found in the level.
- A parent directory called LevelDesign_Workspace was not found.
In order to view warnings after the export process has completed, I provided a extra button in the combo menu which does show warnings in the same pop-up window as the errors, if any were encountered.
Result
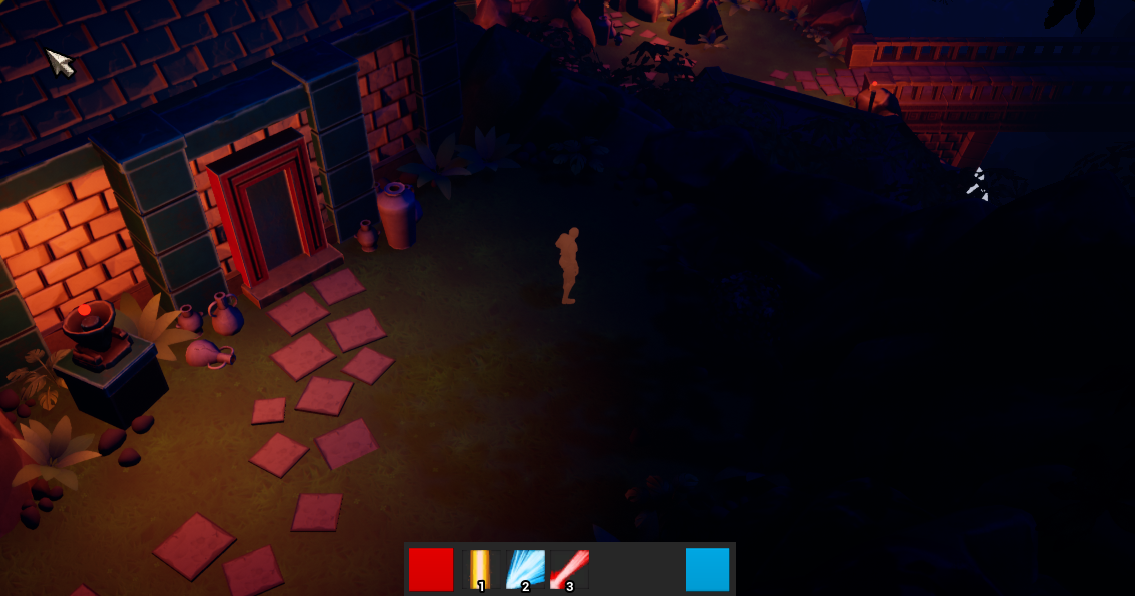
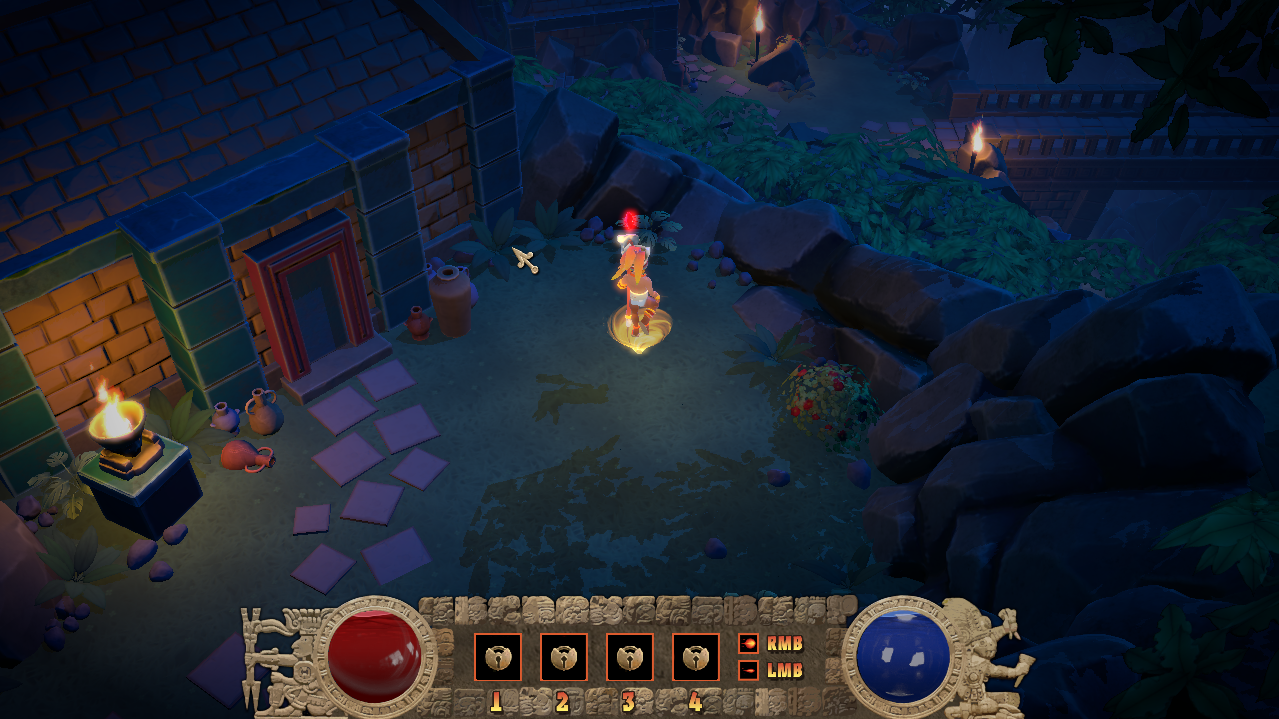
Here is a two-image comparison of the level rendered in Unreal as compared to how it looks when rendered in Katastroganoff.

A scene rendered in Unreal Engine 4

The same scene rendered in Katastroganoff
Thank you for reading!