How to Design Levels in Stella Marina
Everything is Data Driven
In Stella Marina, each level is described by a JSON file that is exported from the Tiled Map Editor.
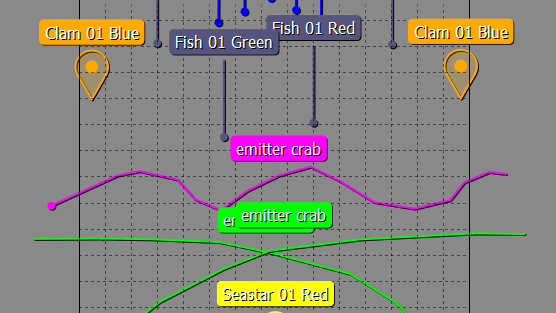
The system I created reads the JSON files and tells the game when and where an enemy should spawn, along with its custom properties that determine its type.
It does this by associating each Tiled object with its position on the y-axis, which directly represents when the enemy should spawn. The system then sorts the objects and inserts them into a std::queue, with the next enemy to spawn in the front. Thanks to this, finding the next enemy to spawn is an O(1) operation. It also allowed me to easily spawn the player anywhere on the level (to allow Level Designers to quickly test a specific part of the level), by simply filtering out enemies with a y-value under a certain threshold.
Enemy Properties
Another of my tasks was to make a system that allows the Level Designers to define custom properties for the enemies. The properties could set things like the movement speed or the bullet pattern of the enemies.

Modular Weapons
The most interesting property to explain is the weapon field. It is a modular bullet script written in JSON. Here is an example:
{
  "sprite": "bullet",
  "shots_per_second": 1.5,
  "bullet_speed": 30.0,
  "spin_speed": 30,
  "bullet_size": 4,
  "bullet_collider_size": 4,
  "bullets_per_shot": 5,
  "angle_between_bullets": 72,
  "angle_offset": 0,
  "use_rotation": true,
  "shoot_towards_player": false
}
How it will look in-game:
Thanks to the modularity of the bullet scripts, they can also be used outside the Tiled editor.
JSON::Weapon weapon = JSON::ReadWeapon("Weapons/boss_weapon_left_hand.json");
WeaponConfig weaponConfig(weapon, false);
myWeapon.Init(myPlayer, myBulletManager, weaponConfig, mySprite);
Because all it takes is a JSON file, the final boss was completely data-driven simply by reusing the existing bullet scripting system.